

Table of Contents
- Why You Should Test Tattoo Machine Voltage Before Every Session
- How to Test a Tattoo Machine With a Multimeter (Step-by-Step)
- Tattoo Machine Voltage Settings: A Quick Reference Chart
- Tattoo Machine Voltage for Lining: What to Aim For
- Tattoo Machine Voltage for Shading: Softer, Slower, Steadier
- Calibration, Safety, and Wireless Machine Testing
- Troubleshooting Chart: What Your Multimeter Reading Is Telling You
- Conclusion
- Frequently Asked Questions
Last Updated: October 15, 2026
Why You Should Test Tattoo Machine Voltage Before Every Session
A tattoo machine's voltage is the electrical push that drives the needle, deciding whether a line pulls clean or chews up skin. Testing takes about two minutes; skipping it risks a blown power supply, a ruined piece, and an unhappy client.
This guide from Electrifick Wants covers how to test tattoo machine voltage with a multimeter, what the numbers mean for lining and shading, and how to spot a failing power supply before it fails on skin.
Here is the part most artists skip. A digital display shows what the unit thinks it is sending, not what reaches the machine. Clips loosen, cables fray, batteries fade, the only way to know the real number is to measure it.
How to Test a Tattoo Machine With a Multimeter (Step-by-Step)
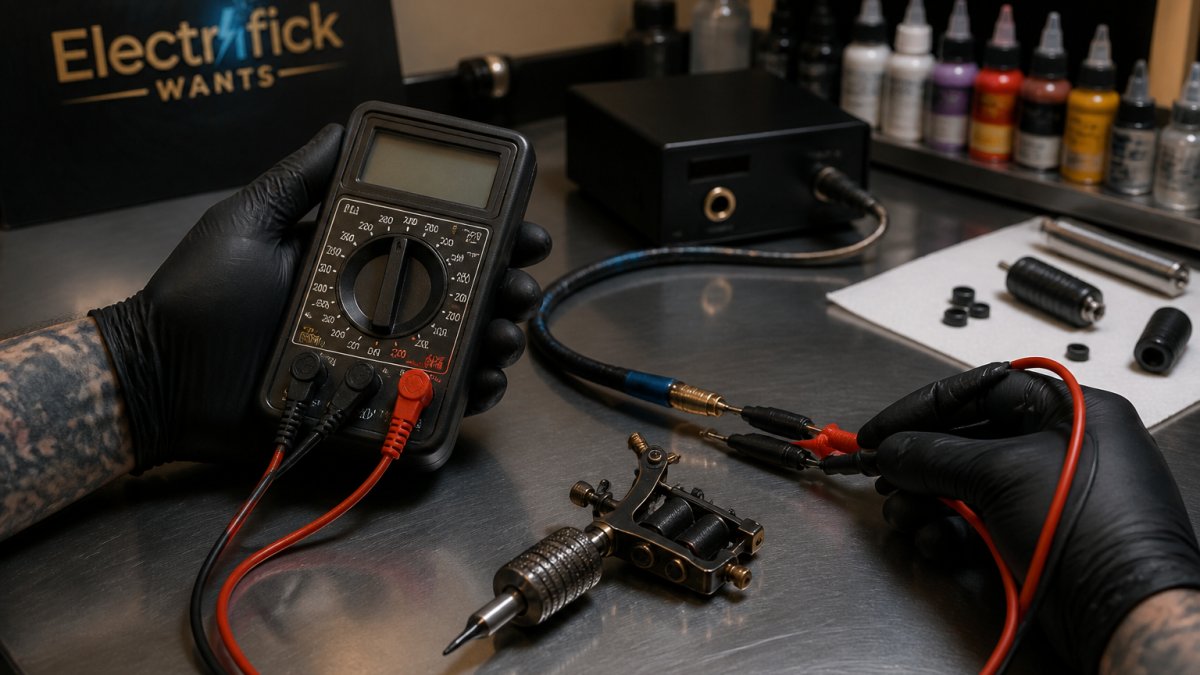
Testing tattoo machine voltage with a multimeter means measuring the actual output at the machine end of the circuit, not at the power supply. It takes about two minutes and a basic digital multimeter.
Here is the short version:
- Power down and inspect the setup
- Connect the multimeter and take a reading
- Test the power supply, cable, and machine as separate parts
Step 1: Power Down and Inspect the Setup
Unplug the power supply before you touch anything. Check the clip cord for cracks, exposed wire, or loose RCA connections, and inspect the machine's binding posts and the supply's output jack. A damaged cable gives a false low reading and sends you chasing the wrong problem.
Set your multimeter to DC voltage, tattoo power supplies run on direct current.
Step 2: Connect the Multimeter and Take a Reading
Clip the black probe to the negative terminal and the red probe to the positive terminal on the machine's binding posts. Turn the supply on, set it to your normal working voltage, and let the display settle.
Compare that number to the power supply's own display. A small gap is normal. A large gap means something in the chain is losing power.
Step 3: Test the Power Supply, Cable, and Machine Separately
Isolate each part to find the weak link: measure at the power supply, then the far end of the cable, then the machine. If the supply reads correctly but the cable end does not, the cable is the problem. If both ends match but the machine runs weak, it needs service.
Tattoo Machine Voltage Settings: A Quick Reference Chart
Voltage settings are starting points, not fixed rules. Use this chart as a baseline, adjust by feel, and verify with a meter.
| Task | Typical Voltage Range | Machine Type | Notes |
|---|---|---|---|
| Fine lining | 7 to 9 volts | Rotary | Slower, more control |
| Bold lining | 9 to 10 volts | Coil or rotary | Needs steady output |
| Black and grey shading | 7 to 9 volts | Rotary | Softer, slower strokes |
| Color packing | 8 to 10 volts | Coil | Higher push for saturation |
| Whip shading | 6.5 to 8 volts | Rotary | Light, fast passes |
Why the Numbers Move
Voltage is only half the story. What drives the needle is voltage plus current draw, and current changes with load: a rotary pulling a single 3RL draws less than the same motor pushing a 14RS magnum through dense skin. When load rises, a supply that cannot hold output sags, exactly what a multimeter catches and a display hides.
Three variables move your working number more than anything else:
- Needle grouping. More needles mean more contact area and more skin resistance. A tight 3RL runs cooler than a 9M1 magnum at the same voltage.
- Stroke length. A longer stroke moves the needle farther per cycle, so it needs less voltage. A short-stroke rotary may need a full volt more than a long-stroke machine for the same line.
- Skin resistance. Loose skin on the inner arm or ribs loads the machine differently than tight skin over a shin or shoulder blade, so the needle hits softer at the same setting.
Reading the Chart Against Your Meter
Here is the part most charts skip: the table's range is what the machine should see at the binding posts, not what the screen says.
A practical workflow:
- Pick a starting voltage from the chart for your task and machine type.
- Set the supply to that number.
- Measure at the machine's binding posts with the machine running under normal load (cartridge installed, footswitch or pedal engaged).
- Note the difference between the display and the measured value.
- Adjust the supply until the measured value lands where you want it.
Once you know your setup's offset, say, the display always runs 0.4 volts high, you can compensate without re-measuring every session. Re-check whenever you swap a clip cord, change batteries, or move to a different supply.
When the Chart Does Not Apply
Some setups do not follow the table at all. Battery-powered pens often show a readout reflecting battery state, not regulated output, so the number drifts as the cell drains: a pen that reads 9.0 volts fresh may read 8.2 an hour in.
Coil machines behave differently: spring tension and contact gap set the mechanical baseline, and voltage only tunes how hard the armature swings.
Use the chart as a compass, not a map. The meter tells you where you actually are.
Tattoo Machine Voltage for Lining: What to Aim For
Lining usually lands between 7 and 9 volts on a rotary machine, enough speed to lay a solid line without tearing skin.
The right voltage for lining is the one where the line goes in clean on the first pass. A second pass for solid black means too low; fast reddening and swelling mean too high.
Needle grouping changes the math: more needles mean more skin resistance, so the machine needs more push.
Measure, Do Not Guess
Most lining-voltage advice stops at the range. The number on your power supply is a request; the number at the machine is the result. You cannot tune lining voltage reliably without measuring at the binding posts.
Poseidon-S-Luxe Dual Power Tattoo Pen Set – Wireless Freedom Meets Wired →
A repeatable lining test:
- Install the cartridge you plan to line with. Load matters, a bare machine reads higher than a loaded one.
- Set the supply to your starting voltage (say, 8.0 volts for a rotary).
- Clip the black probe to the negative binding post and the red probe to the positive binding post. Keep the probes on the posts, not the clip cord ends, so you capture what the machine actually receives.
- Power on and press the footswitch or pedal so the machine runs under load.
- Let the meter settle for three to five seconds and note the reading.
- Compare it to the display. A gap under about 0.2 volts is normal; 0.5 volts or more points to resistance in the cable, a loose RCA, or a tired battery.
Run this test with the machine running, not idle. An idle machine draws almost no current, so the reading looks healthy even when the cable is failing under load.
What the Reading Tells You About the Line
Once you have a measured number, read it against line quality:
- Measured 7.0 to 8.0 volts, line pulls clean on one pass. You are in the sweet spot for most rotary liners.
- Measured below 7.0 volts, line looks grey or broken. The needle is not cycling fast enough to deposit ink consistently. Raise the supply until the measured value climbs into range.
- Measured above 9.5 volts, skin reddens quickly or line blows out. The needle is moving too fast and tearing rather than cutting. Lower the supply and re-measure.
That last pattern is one a display will not show you: a digital readout often holds its number while the actual output sags, because it samples the supply's internal reference, not the load.
Lining on Different Skin
Skin resistance shifts the effective voltage even when the meter reads the same number. Tight skin over a shoulder or shin presents more resistance, so the needle hits harder and you may want to back off; loose skin on the inner arm or ribs presents less, so the same setting can feel soft.
A practical habit: measure once at the start of the session, then re-measure after the first line if the skin reacts differently than expected. Two minutes of testing beats reworking a blown line.
Tattoo Machine Voltage for Shading: Softer, Slower, Steadier
Shading runs lower than lining, usually 7 to 9 volts, aiming for smooth, even coverage rather than a hard line.
Consistency matters more here than raw power.
Stretchy skin is the wild card: on loose areas like the inner arm or stomach, resistance drops and the needle hits differently.
If your shading looks scratchy, check the voltage before you blame your technique.
Calibration, Safety, and Wireless Machine Testing
Digital power supplies can drift out of calibration. Compare the display against a multimeter reading at the same output; if the numbers disagree by more than a small margin, the supply needs service or replacement.
Safety comes down to a few basics:
- Never exceed the voltage rating printed on your machine or power supply
- Keep cables away from water and cleaning fluids
- Replace frayed clip cords immediately
Wireless and battery-powered machines need a different approach: test the battery output directly and check the machine's readout against a multimeter at the battery terminals.
For artists who want both freedom and a stable wired backup, a dual-power setup solves the problem. The Poseidon-S-Luxe Dual Power Tattoo Pen Set ($218.00) runs wireless or plugs in via RCA, and it ships with two high-capacity batteries plus a stable RCA connection for when you need 100% steady output.

Troubleshooting Chart: What Your Multimeter Reading Is Telling You
Match your reading to the symptom, then work through the fix.
| Reading | Likely Cause | Fix |
|---|---|---|
| Reads zero | No power or broken connection | Check outlet, fuse, and clip cord |
| Much lower than display | Worn cable or weak battery | Swap cable or charge battery |
| Drifts during session | Failing power supply | Replace or service the unit |
| Correct but machine weak | Machine needs service | Inspect motor and contacts |
| Erratic jumps | Loose RCA or binding post | Tighten or replace connection |
Work through the chart in order. Most voltage problems trace back to a cable or a battery, not the machine itself.
Conclusion
Voltage problems rarely announce themselves. They show up as a line that will not sit, patchy shading, or a machine that feels weak halfway through a session. Testing before every appointment catches those issues while they are still cheap to fix.
At Electrifick Wants, we stock tattoo equipment built for real working artists. Our curated selection covers dual-power pen sets, reliable power supplies, and the accessories that keep a station running.
Shop Smart. Shop Electrifick Wants.
Frequently Asked Questions
What voltage should a tattoo machine read?
There is no single correct voltage for every tattoo machine. Most artists start around 7 to 8 volts for lining and drop to 5.5 to 7 volts for shading, then adjust based on the machine type, needle grouping, and how the skin responds. Coil machines typically run lower than rotary machines because of their mechanical stroke. Always use your power supply's display as a starting point, then confirm the actual output with a multimeter so you know the tattoo machine voltage reaching the motor is accurate.
Can you test tattoo machine voltage without a multimeter?
You can get a rough sense of output by watching the power supply display, listening to the machine sound, and feeling the vibration through the grip, but none of those confirm the true electrical output. A digital power supply can drift or read inaccurately. A multimeter is the only reliable way to check the tattoo machine voltage at the source. If you do not own one yet, a basic digital multimeter costs under $30 and pays for itself the first time it catches a failing cable or a misread power supply.
Why does my tattoo machine voltage fluctuate during a session?
Fluctuation usually comes from one of three places: a loose RCA or clip cord connection, a power supply that cannot hold steady under load, or a battery in a wireless machine that is dropping as it drains. Start by reseating the cable and testing the power supply, cable, and machine as separate parts with your multimeter. If the power supply holds steady on its own but drops when the machine is connected, the machine or cable is drawing more current than the supply can deliver. Replace the weakest link before your next client.
Should rotary and coil tattoo machines use different voltage settings?
Yes, they usually run at different voltages for the same task. Coil machines rely on a spring and armature assembly, so they often line well around 7 to 9 volts and shade around 5 to 7 volts. Rotary machines use a direct-drive motor and typically need higher settings, often 8 to 10 volts for lining and 6 to 8 volts for shading. The exact number depends on the motor, stroke length, and needle grouping, so treat these as starting points and fine-tune by feel and by what your multimeter shows.