
How to Maintain High End Audio Equipment: 2026 Guide
Table of Contents
- How to Maintain High End Audio Equipment: Step-by-Step
- Step 1: Inspect Cables and Connections for Signal Integrity
- Step 2: Clean Dust From Components and Terminal Contacts
- Preventive Maintenance Checklist for Home Audio
- Best Cleaning Products for Audio Equipment
- Audio Equipment Cooling Best Practices
- Humidity Control and Environmental Stability for High End Audio
- Power Management, Surge Protection, and Capacitor Health
- Firmware and Digital Component Maintenance for High End Audio Gear
- When to Call a Professional for Audio Equipment Servicing
- Frequently Asked Questions
Last Updated: September 30, 2026
How to Maintain High End Audio Equipment: Step-by-Step
High end audio equipment is a precision investment, and how you maintain it determines whether it sounds as good in year ten as on day one. This guide covers how to maintain high end audio equipment, from cable inspection to capacitor health.
Step 1: Inspect Cables and Connections for Signal Integrity
Start with the cheapest fix that delivers the biggest audible improvement: your cables and connections. Oxidation and loose fits are the most common cause of channel imbalance and hum.
- Check RCA, XLR, and speaker terminals for corrosion or discoloration
- Gently reseat every connector to confirm a firm fit
- Flex each cable near the plug to expose internal breaks
- Replace any cable with cracked insulation or a loose ground
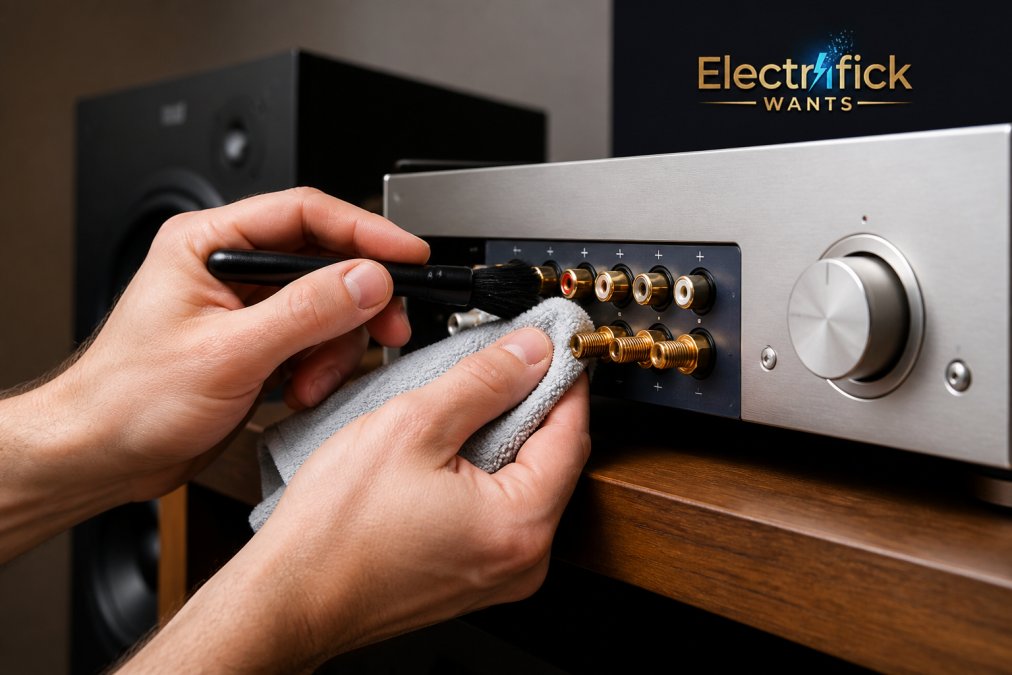
Step 2: Clean Dust From Components and Terminal Contacts
Dust is the enemy of thermal management. It blankets heatsinks, clogs vents, and insulates components that need to shed heat.
Preventive Maintenance Checklist for Home Audio
A preventive maintenance checklist for home audio turns vague good intentions into a repeatable routine. Here's the schedule we recommend.
| Task | Frequency | Why It Matters |
|---|---|---|
| Visual cable and connector inspection | Monthly | Catches oxidation and loose fits early |
| Dust removal from vents and heatsinks | Monthly | Prevents heat buildup |
| Terminal contact cleaning | Quarterly | Maintains signal integrity |
| Full airflow and fan check | Quarterly | Confirms cooling still works |
| Capacitor and power supply inspection | Annually | Flags aging components |
| Professional calibration | Every 1-2 years | Restores reference performance |
Best Cleaning Products for Audio Equipment
The best cleaning products for audio equipment are simple, non-abrasive, and safe for delicate finishes. You don't need a cabinet full of chemicals. You need the right few.
Contact Cleaner Selection Guide
Contact cleaner selection comes down to matching the chemistry to the job.
- Deoxidizers: Remove existing oxidation from metal contacts. Use on older, corroded connections.
- Lubricating cleaners: Leave a thin protective film. Best for potentiometers and moving contacts.
- Zero-residue cleaners: Evaporate completely. Ideal for sensitive circuit boards and switches.
- Dielectric grease: Applied after cleaning to seal out moisture on outdoor or high-humidity connections.
Audio Equipment Cooling Best Practices
Audio equipment cooling best practices boil down to one principle: give heat somewhere to go. Every watt an amplifier draws that isn't converted to sound becomes heat, and heat shortens component life.
Managing Airflow and Thermal Regulation
Managing airflow and thermal regulation starts with rack placement. Passive cooling depends on convection, so hot air must escape upward.
- Leave at least 2-3 inches of clearance above and behind each unit
- Never stack components directly on top of one another
- Keep racks away from direct sunlight and heating vents
- Add active cooling fans only when passive cooling can't keep up
- Vacuum rack ventilation slots every few months
Humidity Control and Environmental Stability for High End Audio
Environmental stability is the silent variable in component longevity. High end audio gear performs best in a stable environment, and swings in temperature and humidity do more damage than any single spike. But there's a second layer most guides ignore: the wood. Turntable plinths, veneered speaker cabinets, and wood side panels are furniture as much as electronics, and they fail on a different schedule than the circuits inside.
The Electronics Side: Stable Beats Perfect
Aim for a stable room with moderate humidity. Extremely dry air encourages static buildup and can dry out speaker surrounds. Excessively humid air corrodes contacts and accelerates oxidation on exposed metal. The goal isn't a specific number, it's a narrow band that holds steady year-round.
- Keep the room between roughly 65°F and 75°F, and avoid rapid swings
- Target indoor relative humidity in the 40-50% range, which is also the range most wood furniture manufacturers recommend for solid and veneered pieces
- Use a hygrometer, a cheap digital one is enough, so you're reacting to data, not feel
- Run a dehumidifier in basements and a humidifier in dry winter climates, but never point either directly at the gear
The Wood Side: Why Veneered Gear Cracks
Wood moves: it absorbs moisture and swells, releases it and shrinks. When humidity swings fast, the outer veneer and the substrate underneath expand and contract at different rates, and the glue line between them gives, a lifted edge, a hairline crack along a cabinet seam, or a plinth that splits near a mounting screw.
Wood Care Habits That Actually Help
- Keep wood-cased gear out of direct sunlight. UV fades veneer and dries the surface unevenly.
- Never place wood-cased components directly above a heat source, a tube amp, a receiver, or a floor vent. Rising heat creates a local microclimate that's far drier than the rest of the room.
- Dust with a dry microfiber cloth. Avoid silicone-based polishes, which can build up in veneer grain and trap grit.
- Use a furniture-specific conditioner sparingly, once or twice a year at most. Over-application is a more common problem than under-application.
- Don't wipe wood with the same cloth you used on metal contacts. Solvent residue from contact cleaner will strip finish.
- If you store gear, store it in the same climate it will live in. A climate-controlled closet beats a garage every time.
When to Stabilize vs. When to Move
If your listening room swings more than about 10% relative humidity across a season, solve it with a room-level humidifier or dehumidifier rather than per-component fixes. If the swing is smaller, focus on placement: keep wood-cased gear off exterior walls, away from windows, and out of the path of HVAC registers.
Power Management, Surge Protection, and Capacitor Health
Power management protects the components you can't easily replace. A quality surge protector or power conditioner shields your system from voltage spikes that quietly degrade capacitors over time, but the surge protector is only half the story. The other half is the capacitors themselves, which most guides skip.
Why Electrolytic Capacitors Fail
Electrolytic capacitors contain a liquid or gel electrolyte that slowly dries out over time, and every hour the capacitor runs hot, that electrolyte evaporates faster. The result is a measurable loss of capacitance and a rise in equivalent series resistance (ESR). As ESR climbs, the capacitor can no longer smooth power supply ripple as designed, and the amplifier's performance degrades in ways you can hear before you can measure.
Service Life and the Heat Rule
Manufacturers rate electrolytic capacitors for a finite number of hours at a reference temperature, typically 1,000 to 5,000 hours at 85°C or 105°C. Every 10°C drop in operating temperature roughly doubles expected service life. An amplifier running 20°C cooler than a poorly ventilated one can see its capacitors last several times longer. Cooling isn't cosmetic; it's the biggest lever you have over capacitor lifespan.
Habits That Slow Capacitor Aging
- Keep the unit cool. Give it the airflow described in the cooling section above, and never run it inside a closed cabinet.
- Avoid constant power cycling. Each cold start sends an inrush current through the power supply. Leaving a solid-state amp idling is generally gentler than switching it on and off several times a day.
- Use a surge protector rated for your system's total draw. Undersized protection does nothing during a spike. Add up the wattage on the rear panel of every component and size accordingly.
- Consider a power conditioner if your line voltage swings. Persistent over-voltage stresses capacitors continuously, not just during storms.
- Don't leave tube gear running unattended for hours. Tube amplifiers run hotter internally, and heat is the aging accelerant.
Symptoms That Point to Aging Capacitors
Watch for these signs, which usually appear gradually:
- A low hum that wasn't present before, especially at 60 Hz
- The unit takes longer to reach full output after power-on
- Channel imbalance that persists after cleaning every connection
- Visible bulging, leaking, or crusty residue on capacitor tops (visible only with the chassis open, do not open it yourself)
What a Technician Actually Does
A technician diagnosing capacitor decline will measure capacitance and ESR against the original spec, then replace out-of-tolerance units, often in matched sets, because a single new capacitor alongside aged ones can create imbalance. A full recap of a vintage amplifier is a scheduled service, not an emergency repair, and it's a common restoration step for gear 20 years old or older.
Firmware and Digital Component Maintenance for High End Audio Gear
Firmware maintenance is the modern half of audio care, and it's where digital components quietly fall behind. Network streamers, DACs, and AV receivers all run firmware that affects performance and compatibility.
When to Call a Professional for Audio Equipment Servicing
Call a professional when the problem involves voltages you can't safely handle. Capacitors can hold a lethal charge long after a unit is unplugged, and electrical licensing exists for a reason.
Reach out to a qualified technician for:
- Persistent hum, buzz, or channel imbalance after cleaning
- Any burning smell or visible component damage
- Capacitor replacement or power supply work
- Speaker driver repair or crossover issues
- Full calibration to restore reference performance
Frequently Asked Questions
How often should I clean my high-end audio components?
Clean dust from exterior surfaces and vents every two to four weeks using a microfiber cloth or soft brush. Deep-clean RCA, XLR, and speaker terminal contacts with a dedicated electronic contact cleaner every three to six months, or sooner if you notice static, crackling, or a degraded audio signal. In dusty homes or rooms with pets, shorten the interval and check connections more often to maintain signal integrity.
What is the best way to clean sensitive audio connectors and cables?
Power the system down and unplug it first. Apply a small amount of electronics-grade contact cleaner to a lint-free swab, then gently wipe the metal surfaces of RCA, XLR, and banana plugs. For stubborn oxidation, use a deoxidizer formulated for audio gear, let it dry fully, and reconnect. Avoid abrasive pads or household cleaners, which can strip plating and harm the low-level signal carried through these connections.
Should I leave my high-end audio equipment powered on or off?
For solid-state amplifiers and preamps, leaving them powered on keeps the circuitry at a stable temperature, which many listeners prefer for consistent sound. However, continuous power increases exposure to surges and shortens capacitor life. A practical compromise is to power down during long absences and use a quality surge protector or power conditioner at all times. Tube gear should always be powered off when not in use.
How does humidity affect high-end audio gear?
High humidity accelerates oxidation on connectors and can cause corrosion inside potentiometers, switches, and circuit boards. It also affects wood-cased speakers and turntable plinths, which can swell, warp, or crack. Low humidity invites static discharge that damages sensitive digital components. Aim for a stable 40 to 50 percent relative humidity in your listening room, and use a dehumidifier or humidifier as needed to protect both audio fidelity and hardware reliability.
Maintaining high end audio equipment isn't about expensive products. It's about consistency: monthly dusting, quarterly cleaning, stable conditions, and knowing when to hand things off to a pro. Get those habits right and your system will reward you for years.
Electrifick Wants makes it easy to find the accessories and gear that support that routine, with a curated selection of trusted brands and free shipping on orders over $50. Shop smart. Shop Electrifick Wants.
