

Table of Contents
- Why Scuba Regulator Maintenance Matters for Every Dive
- Pre-Dive and Post-Dive Inspection Checklist
- How to Clean a Scuba Regulator Safely
- Drying, Scuba Regulator Storage, and Transport
- How Often to Service a Scuba Regulator
- Scuba Regulator Troubleshooting: Symptoms and Urgency
- What Divers Can Inspect vs. What Requires a Technician
- Conclusion
- Frequently Asked Questions
Last Updated: October 20, 2026
Why Scuba Regulator Maintenance Matters for Every Dive
Your regulator is the one piece of scuba gear that has to work perfectly every single time.
That's why scuba regulator maintenance tips for divers matter more than any other gear habit.
Here's the core idea: most regulator problems start small. A grain of salt, a dry O-ring, a cracked mouthpiece.
The good news is that the daily care takes minutes.
Pre-Dive and Post-Dive Inspection Checklist
A quick inspection before and after each dive catches most problems while they're cheap to fix. The whole routine takes about two minutes each way.
What to Check Before You Splash
Run through this list at the tank, with your gear assembled:
- Turn the valve slowly and listen for leaks at the first stage
- Watch the pressure gauge for a steady needle
- Press the purge button on both second stages and confirm smooth airflow
- Look at the mouthpiece for cracks or missing zip ties
If anything feels off, don't splash. A common mistake is ignoring a slight hiss at the first stage. That hiss is often a worn O-ring, and it won't fix itself underwater.
What to Check After You Surface
Post-dive checks are quicker:
- Close the tank valve and purge the hoses to release pressure
- Look for water inside the second stage or behind the diaphragm
- Check for sand or grit in the mouthpiece and inlet
- Feel the hoses for soft spots or kinks
- Note any change in breathing resistance during the dive
How to Clean a Scuba Regulator Safely
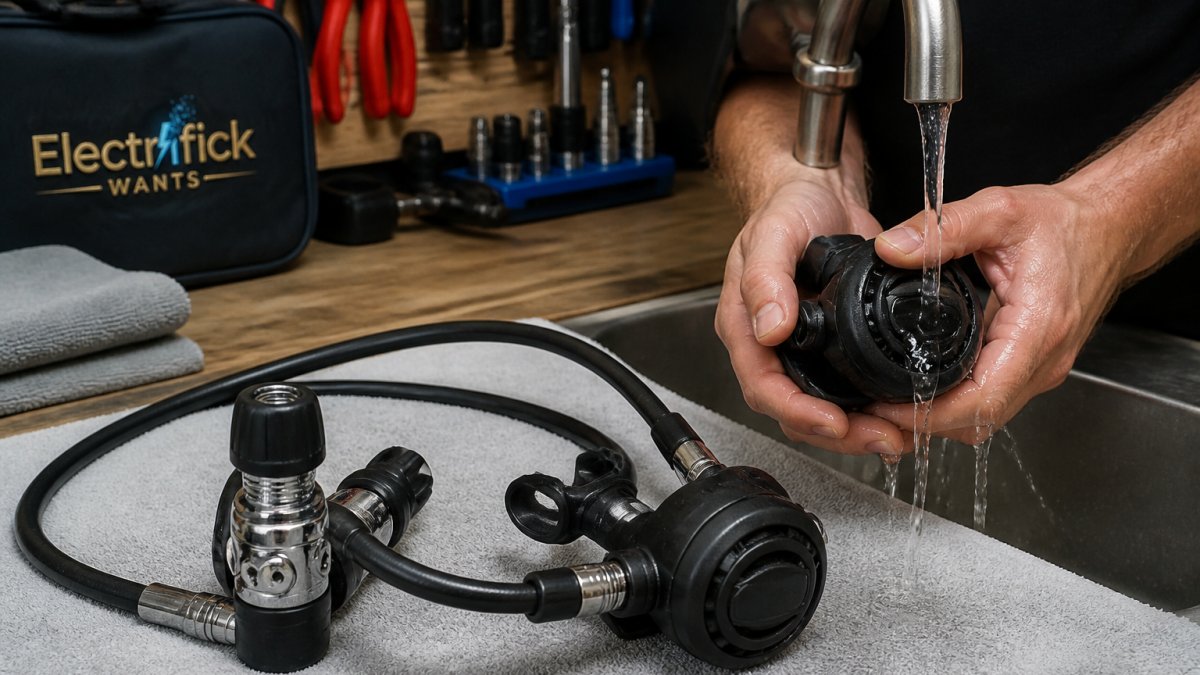
Cleaning is where divers do the most damage. Water forced into the first stage is the number one cause of internal corrosion, and it usually happens during a well-intentioned rinse. The fix is a repeatable sequence, not a scrub, that keeps water on the outside where it belongs.
The Post-Dive Cleaning Sequence
Run this in order every time you come off the water. It takes about five minutes and prevents the slow damage that shows up months later.
- Keep the regulator pressurized or capped. Either leave the first stage on the tank with the valve closed, or fit the dust cap firmly over the inlet. Never rinse with the inlet open.
- Rinse the second stages first. Use low-pressure fresh water, a gentle tap or a shower, not a hose jet. Hold each second stage with the mouthpiece pointing down so water runs over the case and out, not into the valve.
- Do not press the purge button while submerged. Pressing purge under water opens the valve and pulls water into places it can't drain from.
- Rinse the first stage exterior only. With the cap on or the unit on a closed tank, let water run over the body and the hose ports. Do not direct water at the inlet or the ambient chamber openings.
- Rinse the hoses and connectors. Wipe down the low-pressure hose and the connector O-rings with fresh water; salt left on a connector O-ring dries into grit that abrades the seal.
- Shake off excess water and pat dry with a clean, lint-free towel. Do not use compressed air, it can drive moisture past seals.
- Hang to dry by the first stage in shade with good airflow before storage.
Freshwater, Saltwater, and Contaminated Water Care
The environment you dove in changes the rinse, not just the frequency.
Freshwater. A quick rinse and full dry is usually enough.
Saltwater. Rinse with fresh water as soon as you can, ideally the same day. Salt crystals form as water evaporates and can stiffen diaphragms and clog small passages.
Contaminated water, quarry water, water with visible debris, or water where you suspect biological or chemical contamination.
What Not to Do
- Don't soak the first stage. Submerging it, even with the cap on, risks water past the cap seal.
- Don't use detergents, solvents, or bleach on regulator components; they attack rubber and leave residue.
- Don't scrub with abrasive pads on metal surfaces; you'll remove protective finishes and create corrosion sites.
- Don't store a wet regulator in a closed bag, even overnight.
Drying, Scuba Regulator Storage, and Transport
Proper scuba regulator storage keeps seals soft and prevents the slow damage that shows up months later. Drying first is non-negotiable.
Hang the regulator by the first stage in a shaded, well-ventilated spot. Keep it out of direct sunlight, which degrades rubber hoses and mouthpieces.
For storage:
- Keep the dust cap on the inlet at all times
- Store loosely coiled hoses, never kinked or crushed under tanks
- Avoid closed plastic bags that trap moisture
- Keep away from heat, exhaust fumes, and ozone sources
For transport, use a padded regulator bag and pack it on top of heavier gear.
Shop Smart. Shop Electrifick Wants. →
How Often to Service a Scuba Regulator
The short answer: follow the manufacturer's service interval, and shorten it if you dive a lot. Most makers publish an annual or biennial recommendation, and those intervals assume a certain number of dives per year.
Service Intervals Based on Use and Manufacturer Guidance
Use this as a planning guide, then confirm the exact interval in your regulator's manual:
| Diving Pattern | Typical Service Window | Why |
|---|---|---|
| Few dives per year, freshwater | Manufacturer interval, often annual | Seals age even in storage |
| Regular saltwater diving | Annual, or sooner if symptoms appear | Salt and wear accelerate seal damage |
| Heavy use or training | Annual, with mid-year inspection | High cycle counts wear valves and seats |
| Gear stored long-term | Annual inspection regardless | Dry O-rings crack silently |
Here's what most guides miss: the calendar matters as much as the dive count. O-rings and diaphragms age whether you dive or not. A regulator that sat in a closet for two years still needs a look before it goes back in the water.
Scuba Regulator Troubleshooting: Symptoms and Urgency
Some symptoms mean "service soon." Others mean "stop diving now." The gap most guides leave is the middle: what each symptom likely means and what to do about it before your next splash. Use this symptom-to-action guide as a triage tool, then confirm with a qualified technician.
Stop Diving Immediately
These are surface-and-abort signals. Do not descend, and do not "test it on the next dive."
- A free-flow that won't stop, often a failed or stuck downstream valve, or a damaged diaphragm. Shut the tank valve, purge the lines, and take the regulator out of service.
- Water inside the second stage during a dive, a breached diaphragm or a damaged exhaust valve. Rinse externally, dry, and have it inspected before reuse.
- A sudden, large change in breathing resistance, could be a stuck valve, a failed seat, or an obstruction. Treat it as a failure, not a quirk.
- Air leaking steadily from the first stage, a worn O-ring or a cracked component. A steady leak can worsen with depth and pressure.
Schedule Service Soon
These are "finish the trip if you must, but book service before the next one" symptoms. Note them in your log with the date and conditions.
- A slight hiss at the first stage between breaths, often a worn O-ring or a small seat leak. It won't fix itself and tends to worsen.
- Breathing that feels stiffer than usual, could be a partially stuck valve, a swollen O-ring, or debris. Compare against a buddy's regulator on the same tank to rule out a supply issue.
- A sticky purge button, grit or salt in the purge mechanism. Rinse and dry; if it persists, service it.
- Visible cracks in the mouthpiece or hose, replace the part before the next dive; a mouthpiece failure at depth is a real risk.
- Corrosion or pitting on metal surfaces, early corrosion spreads; a technician can assess whether it's cosmetic or structural.
Monitor and Recheck
- Minor cosmetic wear on the case or hose covers, no action beyond normal care.
- A faint taste or smell after a contaminated-water dive, rinse thoroughly and have the internals inspected if it persists.
For scuba regulator troubleshooting, trust your gut and your log. A written note, "slight hiss at first stage, starboard side, after second dive", gives a technician a head start that "seemed fine" never will.
What Divers Can Inspect vs. What Requires a Technician
You can handle the outside. A technician handles the inside. That line is clear, and crossing it usually voids warranties and risks damage.
You can inspect and handle:
- Mouthpieces, zip ties, and hose covers
- The dust cap and inlet
- Visible O-rings on hose connectors
- Rinsing, drying, and storage
- Pre-dive function checks
Leave to a technician:
- Disassembly of the first or second stage
- Ultrasonic cleaning of internal parts
- O-ring replacement inside the valve
- Lubrication of internal seals
- Pressure testing and final function checks
At Electrifick Wants, we stock the accessories that make routine care easy, from mouthpieces and hose protectors to padded regulator bags. Our curated scuba selection focuses on gear that holds up to saltwater and repeated use.
Conclusion
Regulator care comes down to a few small habits repeated every dive: inspect, rinse with the dust cap on, dry fully, store loosely, and service on schedule.
When it's time to refresh your kit, Electrifick Wants makes it simple. We offer fast, reliable shipping, free shipping on orders over $50, and a curated range of scuba accessories and dive gear you can trust.
Frequently Asked Questions
How do you clean a scuba regulator after diving?
Rinse the regulator in fresh water with the dust cap secured on the first stage and the second stage mouthpiece covered. Soak or rinse for a few minutes, then press the purge button gently to flush the second stage. Never press the purge while the regulator is pressurized or submerged in a way that forces water into the inlet. Shake off excess water, dry the components in a shaded, ventilated spot, and store loosely coiled. Skip harsh cleaners, and avoid high-pressure water that can push salt and contaminants deeper into the valve.
How should you dry and store a scuba regulator?
Hang or lay the regulator in a shaded, well-ventilated area away from direct sun, which degrades rubber and silicone parts. Do not use compressed air to dry it, since that can force moisture into the first stage. For scuba regulator storage, keep it loosely coiled in a clean gear bag, avoid tight bends in the hoses, and store it away from heat, ozone sources, and heavy items. The dust cap should stay on the first stage inlet whenever the regulator is off a tank.
How often should a scuba regulator be serviced?
Most manufacturers recommend an annual service or a service based on dive count, often around 100 dives per year, whichever comes first. Divers logging fewer dives may still need annual inspection because seals and O-rings age even in storage. Saltwater diving, contaminated water, and heavy use shorten intervals. Follow your specific manufacturer's recommendations and have a qualified technician perform disassembly, ultrasonic cleaning, lubrication, and a function check rather than attempting internal service yourself.
How can you tell if a scuba regulator needs professional service?
Watch for breathing resistance that feels heavier than usual, free-flow at the surface, a persistent leak at the hose connector, visible corrosion, cracked mouthpieces, or water intrusion in the first stage. Any of these symptoms means the regulator should come out of service until a technician inspects it. Do not dive on a regulator you suspect is faulty, and never try to fix internal valve issues yourself. A pressure test and function check by a professional confirms whether the regulator is safe to return to the water.